Showing posts with label wool. Show all posts

Monday, January 30, 2017

Mad for Plaid // Novelista Pattern Hack


Hello and Happy 2017!! I realize it is almost February, but I am so excited to be back blogging and share this project with you! Ever since I saw this amazing Novelista hack  from Falafel and the Bee, I knew I needed a Novelista dress in my life. To add to the fun, I decided to make it in plaid and use the skirt from the By Hand London Anna Dress, which happens to be seven gores. To say cutting it out was a headache would be an understatement!

The plaid fabric is Robert Kaufman flannel and after sewing with it, I'm not sure if I can ever use anything else. It is amazingly soft and high quality. I only had 3 yards of it too, so I was holding my breath to get all the pieces cut.


Hacking the Novelista Shirt  into a dress was pretty simple. First, I held the pattern pieces up to myself to decide where I wanted it to to end. I sewed the shortened bodice following the pattern instructions. Next, I sewed the skirt panels together and added a four inch wide band to the top of the skirt. Then I sewed the skirt and bodice together. At first the bodice was too big and I was not able to ease it in to fit the skirt. My aunt gave me the genius idea to gather the bodice slightly and I love how it looks!


You may be wondering how I got the dress on since the snaps only go half way down the bodice. Enter, the side zipper! There is a funny story behind this. I had finished my dress and there was no side zipper. I tried it on and forced the dress over my head. It fit really, really well. In fact, it fit so well that I couldn't get it off! I had a feeling that might happen, but I was hoping I wouldn't have to sew in a zipper. I ended up using my seam ripper and taking out enough of the side seam to get myself out of the dress. Seam rippers are lifesavers!

I am really happy with how well the plaid matches up where the zipper is sewn. You can hardly even see it!


The contrasting grey fabric is scraps of wool from my stash. It is almost a perfect match to the grey in the plaid. I hate the itchy feeling of wool, so I interlined the yoke and waistband with some brown linen (also from my stash). The button placket and sleeve cuffs are interlined with the flannel. The dress is soft and cozy all around!


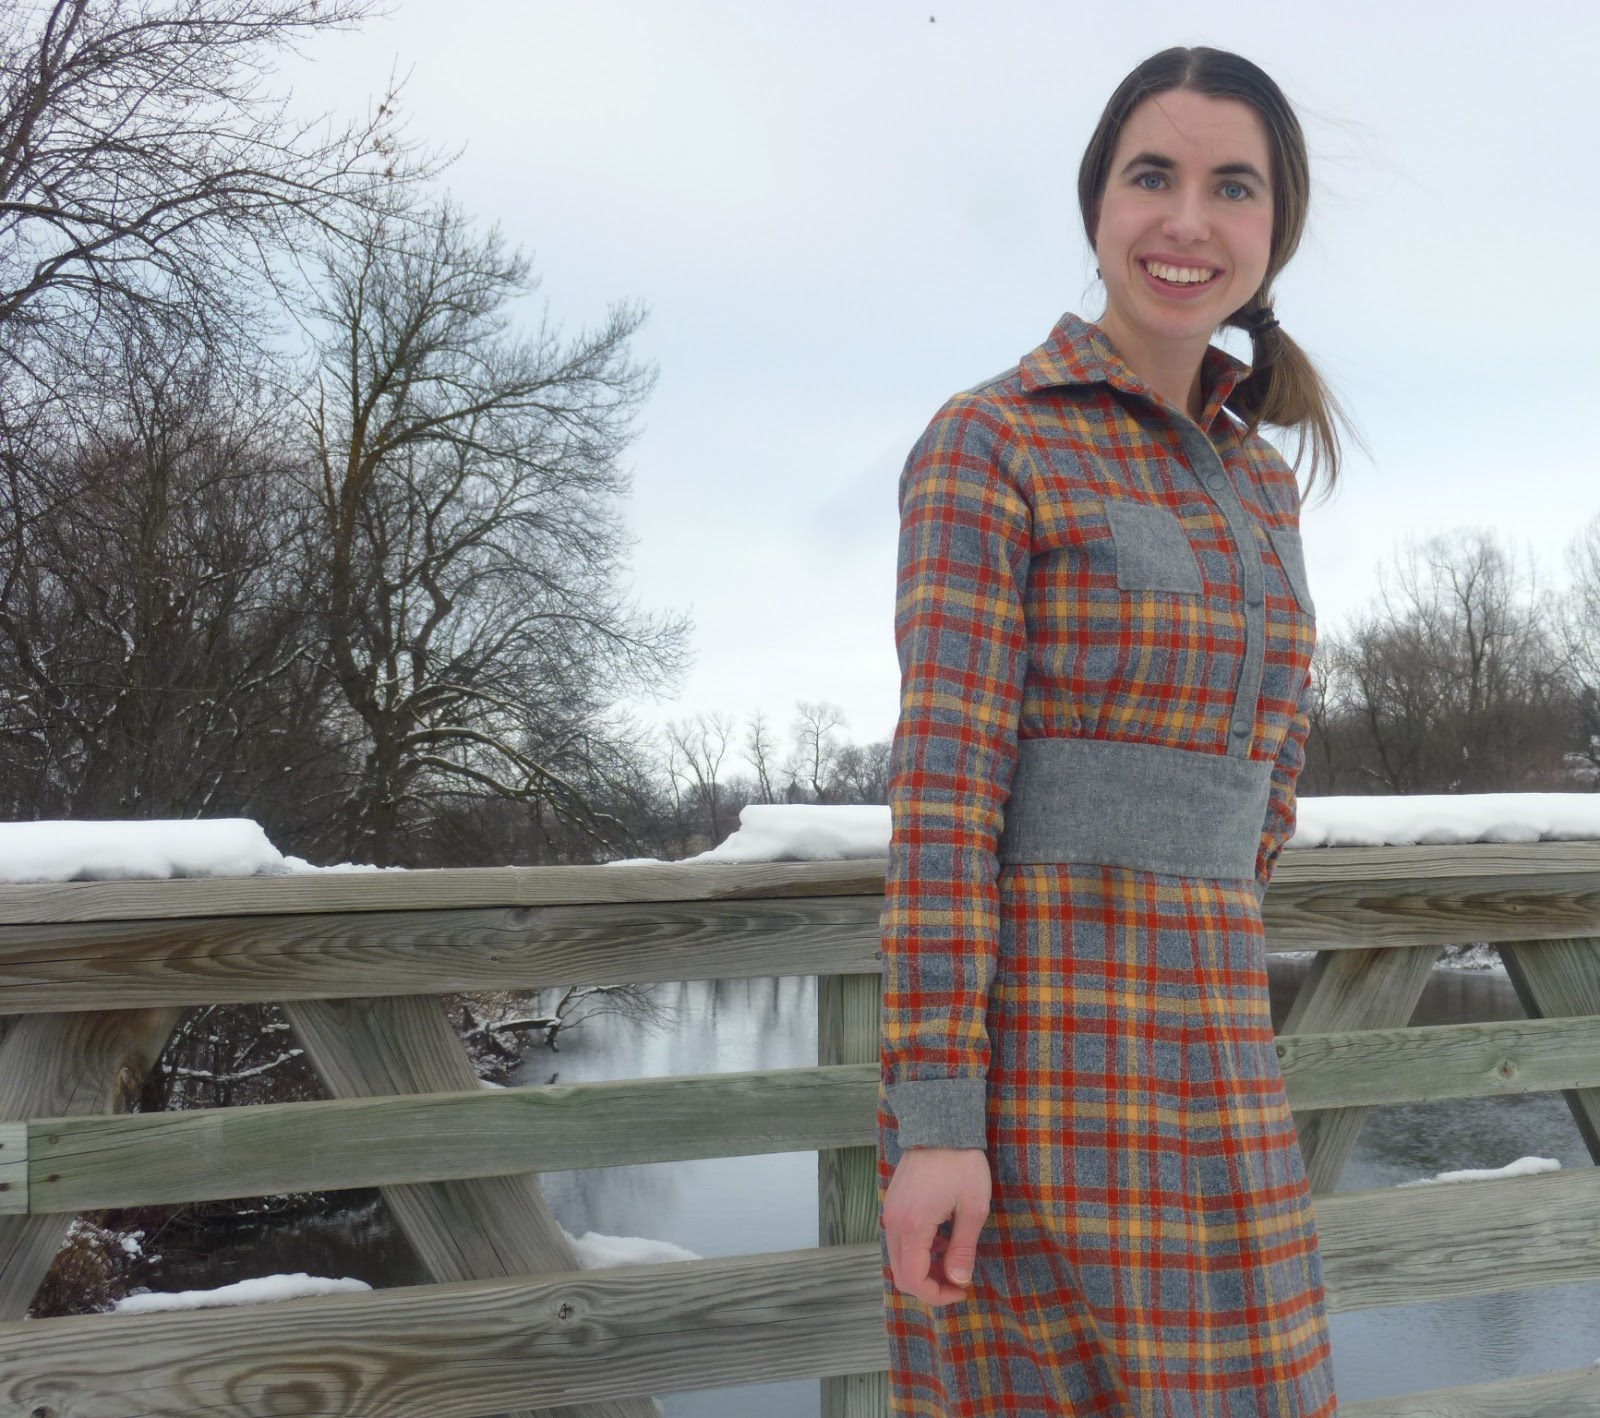
The button placket ended up being super thick with the wool and flannel, so I decided to use snaps instead of buttonholes. The only snaps I could find at Joann's almost didn't go through all my layers of fabric, but somehow it all worked out!

I also topstitched the waistband with one of my machine's decorative stitches. It's adds a really subtle detail to the dress.


I am trying to embrace the cold, but my hands were not having it! By the time I was finished, they felt like ice. Minnesota is not the best place for blog photo shoots this time of year!


The only change I made to the skirt pieces was to lengthen the midi length by 4 inches. I also sewed a one inch hem. 

Here is a look at the inside of my dress with the brown linen interlining. All of my seams are finished with my overlock stitch on my sewing machine. It is time consuming (and uses so much thread!) but worth it to have nicely finished seams. 


Sleeve plackets are not my forte, but I'm improving! I really wanted the plaid to match here, but I ran out of fabric.


This is the first time I have successfully hacked a pattern and I love how it turned out! I think a chambray, short sleeve version with a circle skirt would be lovely for spring! 

~Elizabeth

Wednesday, March 5, 2014

Pinafore Dress

 
This week, I was inspired by Tricia from the Farmish Momma to make this Pinafore Dress after she posted pictures of one she made with some instructions here. I am friends with her oldest daughter, whom I have seen pictures of wearing dresses similar to this one. However, I never knew they were handmade! I loved the style after I first saw my friend's dress, so I was happy to find out I could make one myself!

 
The construction was so easy! I read the blog post and that same night I cut out the pieces to make the dress, which are basically two rectangles plus the straps. The instructions given in the post say to make the skirt by multiplying your hip measurement by 4. However, I thought that would make the skirt a little too gathered for me (and Tricia made the dress for a younger girl) so I multiplied my hip measurement by 3. I think next time, even doubling it would be enough.
 
In the back I decided not to cross the straps, but you can if you want to. I also used an invisible zipper, but any type of zipper would work just fine. I also didn't put the zipper up far enough when sewing it in, but it's not that big of a problem.
 
 
It's hard to tell in these pictures, but I used red thread for the topstitching. I made a wide 6 inch waistband and the skirt hits just past my knee. The fabric is some I've had in my stash for many years. It is wool and was given to me by a sewing friend when my interest in making clothing first began. There must've been 4 or 5 yards total because I have previously used this fabric to make both me and my mom a skirt. I had enough for this dress and there are still a few bits and pieces left.

 
I want to make more of these dresses in cotton. They would be perfect for the summer and I think my sister would like one too! The wool is perfect for the weather we're having now though. It is so warm to wear, but I was freezing when I took these pictures! It was only 3 degrees! Brrrrr!

 
The skirt is very full and so fun to twirl!
 
Linking up with Farmish Momma for the Pinterest Pin-along.

~Elizabeth

Wednesday, February 19, 2014

Go-To Cape and Winter Boots

This week, the challenge over at Project Sewn is "If the Shoe Fits". The idea is to pick your favorite pair of shoes and sew an outfit to go with. I live in Minnesota. And right now we have tons of snow! So for this challenge, I chose my winter boots because they definitely keep my feet warm and dry, which is perfect if you have to walk around outside in this weather!

Do you wanna build a snowman??
 
In case you're wondering, yes, I did build a snowman, by myself, wearing my Lady Skater dress, leggings and boots. I put my cape on afterwards though.
 
I thought my Go-To cape would be perfect with my winter boots. It is a fully lined cape made using purple plaid wool and plain purple flannel for the lining. I was actully getting hot standing in the sun while I took pictures. It is 40 degrees today - a heat wave compared to the weather we've been having here!

 
The cape has an oversized hood, which is one of my favorite parts! I also made the peekaboo lining - you can see the lining "peeking out" on the hood. The pattern calls for four 3/4" buttons, but I thought that size was too small, so I used four 1 1/8" buttons. They worked perfectly!
 
 
Andrea, of Go-To Patterns, designed this cape to hit at the hip level. However, I wanted a longer cape, so I cut out the long length, which is for people taller than 5'9" (I'm 5'7").


 I was having fun with the photo shoot! You can see the plaid in this picture too. It's harder than you think setting up a tripod in the snow and running back and forth after every picture. The snow is pretty deep too! There must be over a foot accumulated in the back yard - the snow almost came to the top of my boots.


Here's the back. I have always been afraid of sewing with plaid, but I did it! And the back seam matches up!!

I received the plaid wool from a friend and have had it for a few years. I knew I was keeping it for a reason! It is so warm and pretty thick. I bought the flannel at Jo-Ann Fabrics when it was on sale, and I was able to use a gift card, so I only ended up spending $15 for 4 yards of flannel. That's a deal!

Oh, you know, just contemplating life. :)

 
Finally, here's a better picture of my boots, since the snow covered them in almost all my other pictures. They were the whole inspiration for my outfit. As you can see, they're pretty wet in this picture, but they kept my feet dry!

Would you wear a cape?

~Elizabeth

Thursday, January 23, 2014

New Favorite Accessory


With the weather we've been having here, you definitely need something to cover your ears when you step outside! These embellished earwarmers are just the thing and I've been wearing mine everywhere!

I received Kay Whitt's newest book, Sew Serendipity Sewing Workbook, for Christmas and this was one of the projects in the Winter section. The book has many tips and tricks from Kay and 8 different projects separated by season. There's also room for taking notes - I've been using the note section to keep track of all the projects I make this year!

 
This earwarmer project is completely handsewn and features wool and fleece as well as hand embroidery and beads. I don't know a lot about embroidery, but this project uses a simple backstitch and I was able to learn it quickly after looking up a tutorial online.

 
The flower is made from six heart shapes and leaves a cool three dimensional effect once you sew it on the headband. The headband attaches behind your head with velcro.

 
These headband make great gifts too! I made one on New Year's Eve for myself (the one I'm wearing in the picture) and another one New Years Day for my aunt. They are quick to sew and would be great for on the go projects since you don't need a sewing machine. I already have ideas for more color options! I'm thinking red fleece, black wool, a red wool flower and red beads.

 
Perfect for cold winter days!
 
Do you prefer to wear a hat or headband in the cold?

~Elizabeth